Countdown Banner JP User Guide
This guide explains the steps to create a countdown banner using the app and display it on your store.
Table of Contents
- Create a Banner
- Use Templates
- Advanced Settings (Schedule & Link)
- Display on Online Store
- Advanced Customization
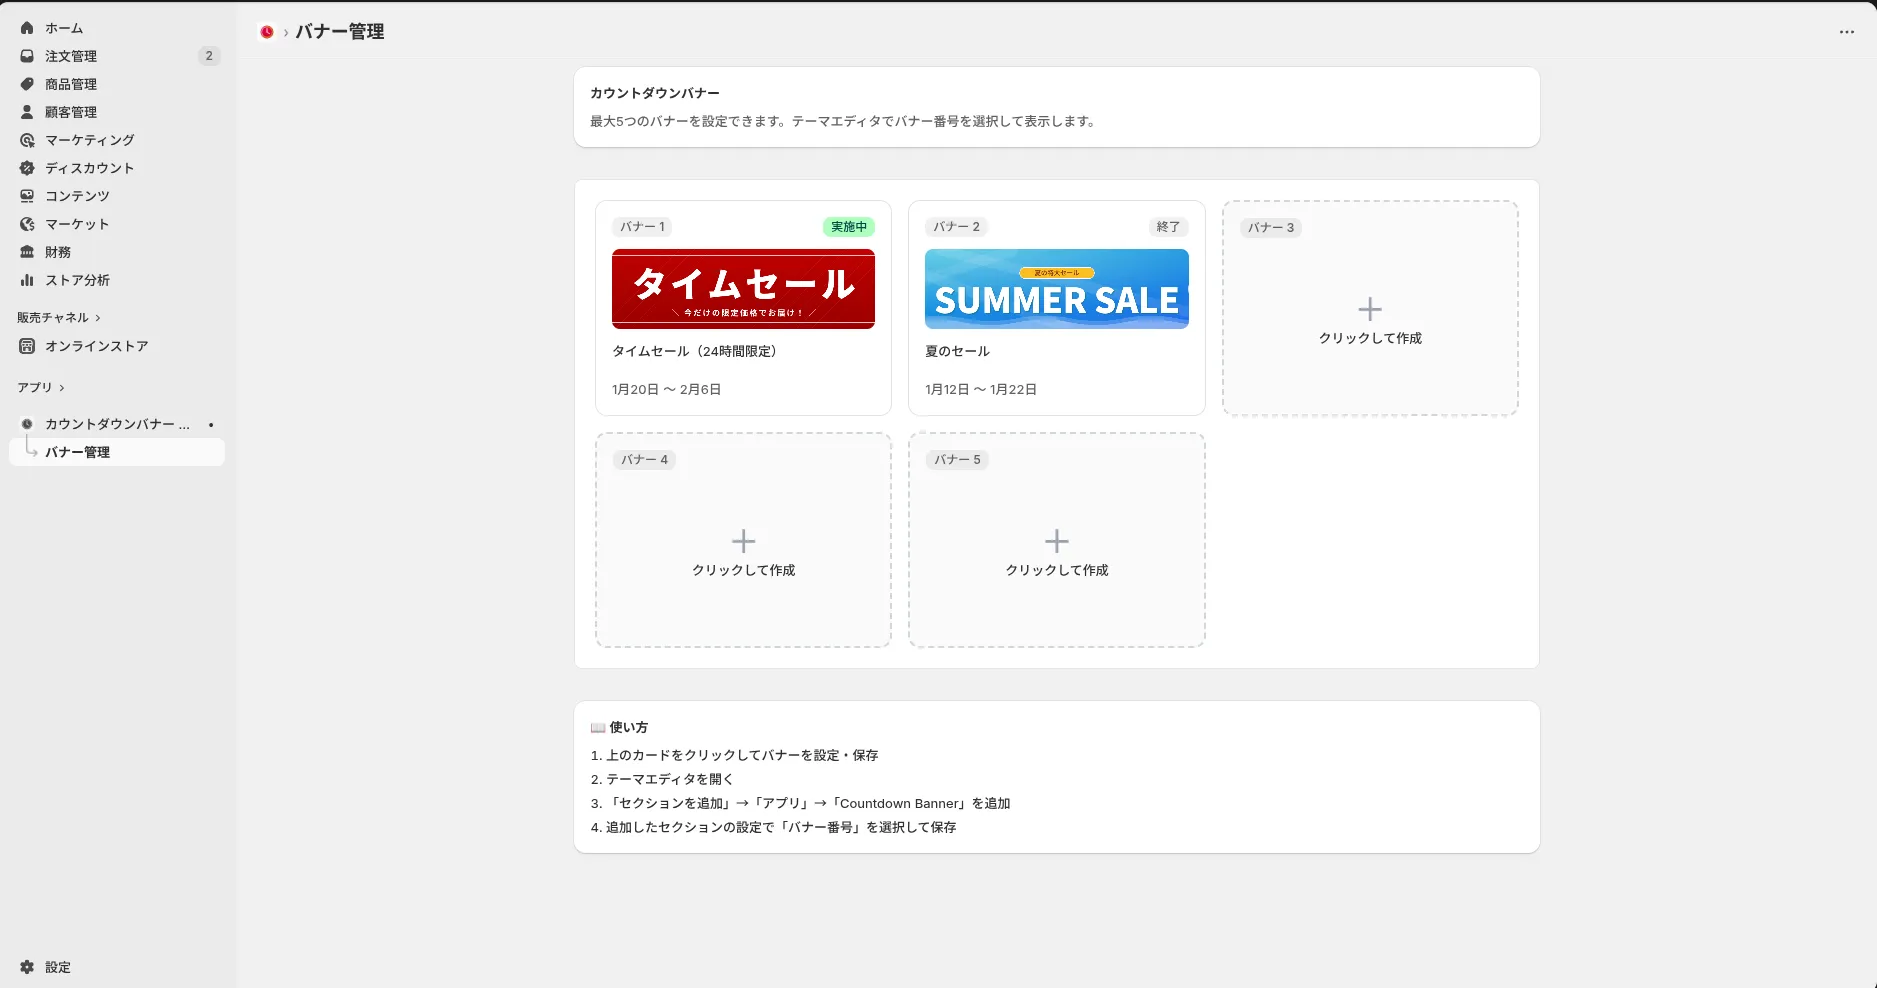
1. Create a Banner
After installing the app, the dashboard screen will appear. You can create and save up to 5 banners in this app.
- Click on any of the cards from "Banner 1" to "Banner 5" on the dashboard.
- Slots that have not been created yet are displayed as "+ Click to create".
2. Use Templates
The banner edit screen opens. The easiest way to create a high-quality banner is to use the "Template Function".
- Scroll down the screen and look for the "🎨 Start from Template" section.
- Click on a button like "⚡ Flash Sale" or "📅 Weekend Sale".
- Automatically, a professionally designed image and color scheme will be set.
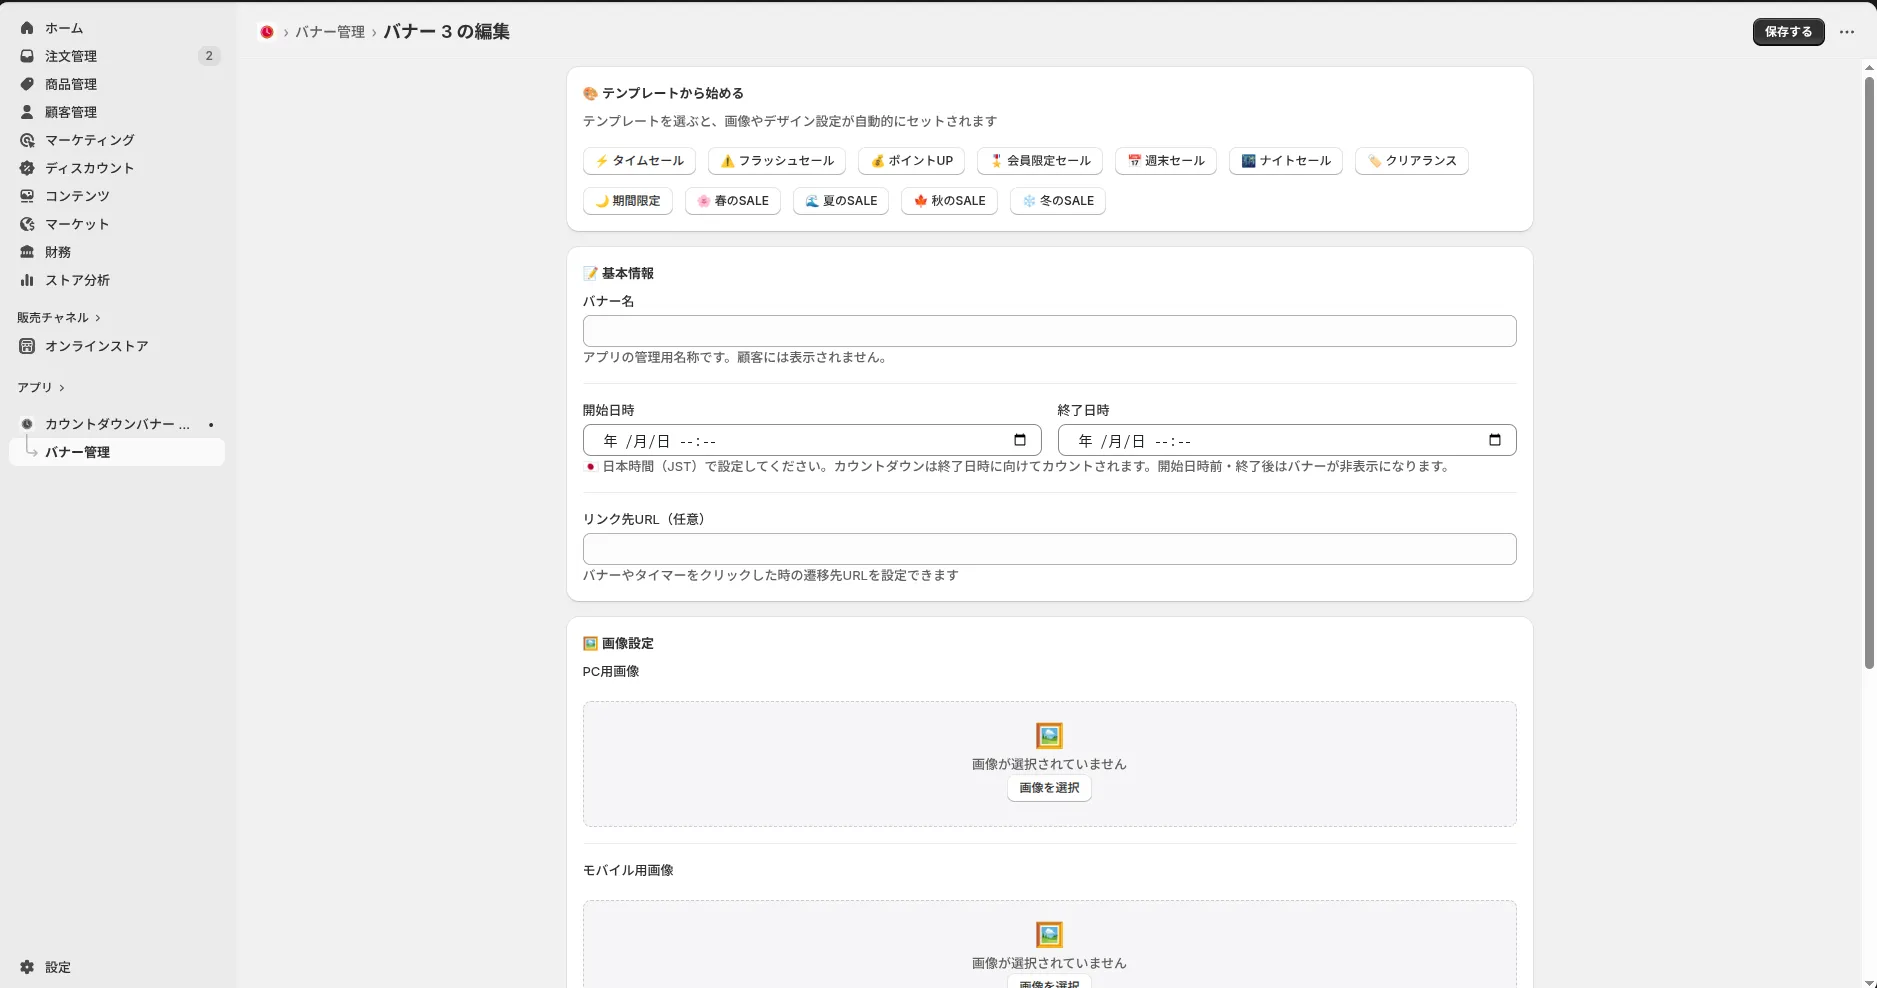
3. Advanced Settings (Schedule & Link)
Once you have selected a template, enter the specific information for that sale. Configure settings in the "📝 Basic Info" section at the top of the screen.
Required Fields
- Banner Name: A name for your management (e.g., "Weekend Sale"). This is not visible to customers.
- Start Date: Set the date and time to start displaying the banner.
- End Date: Set the date and time when the sale ends. The timer counts down towards this date and time.
- Note: When the End Date passes, the banner will automatically disappear.
Optional Fields
- Link URL: The destination when the banner is clicked. Setting a specific collection page (e.g.,
/collections/sale) is effective.
When you are finished with the settings, click the "Save" button at the bottom right of the screen.
4. Display on Online Store
Just saving the banner does not make it appear on your store yet. You need to specify the display location using the Shopify Theme Editor.
- From the Shopify admin, click "Online Store" -> "Customize" to open the Theme Editor.
- Click "Add section" from the menu on the left.
- Select "Countdown Banner" from the "Apps" tab.
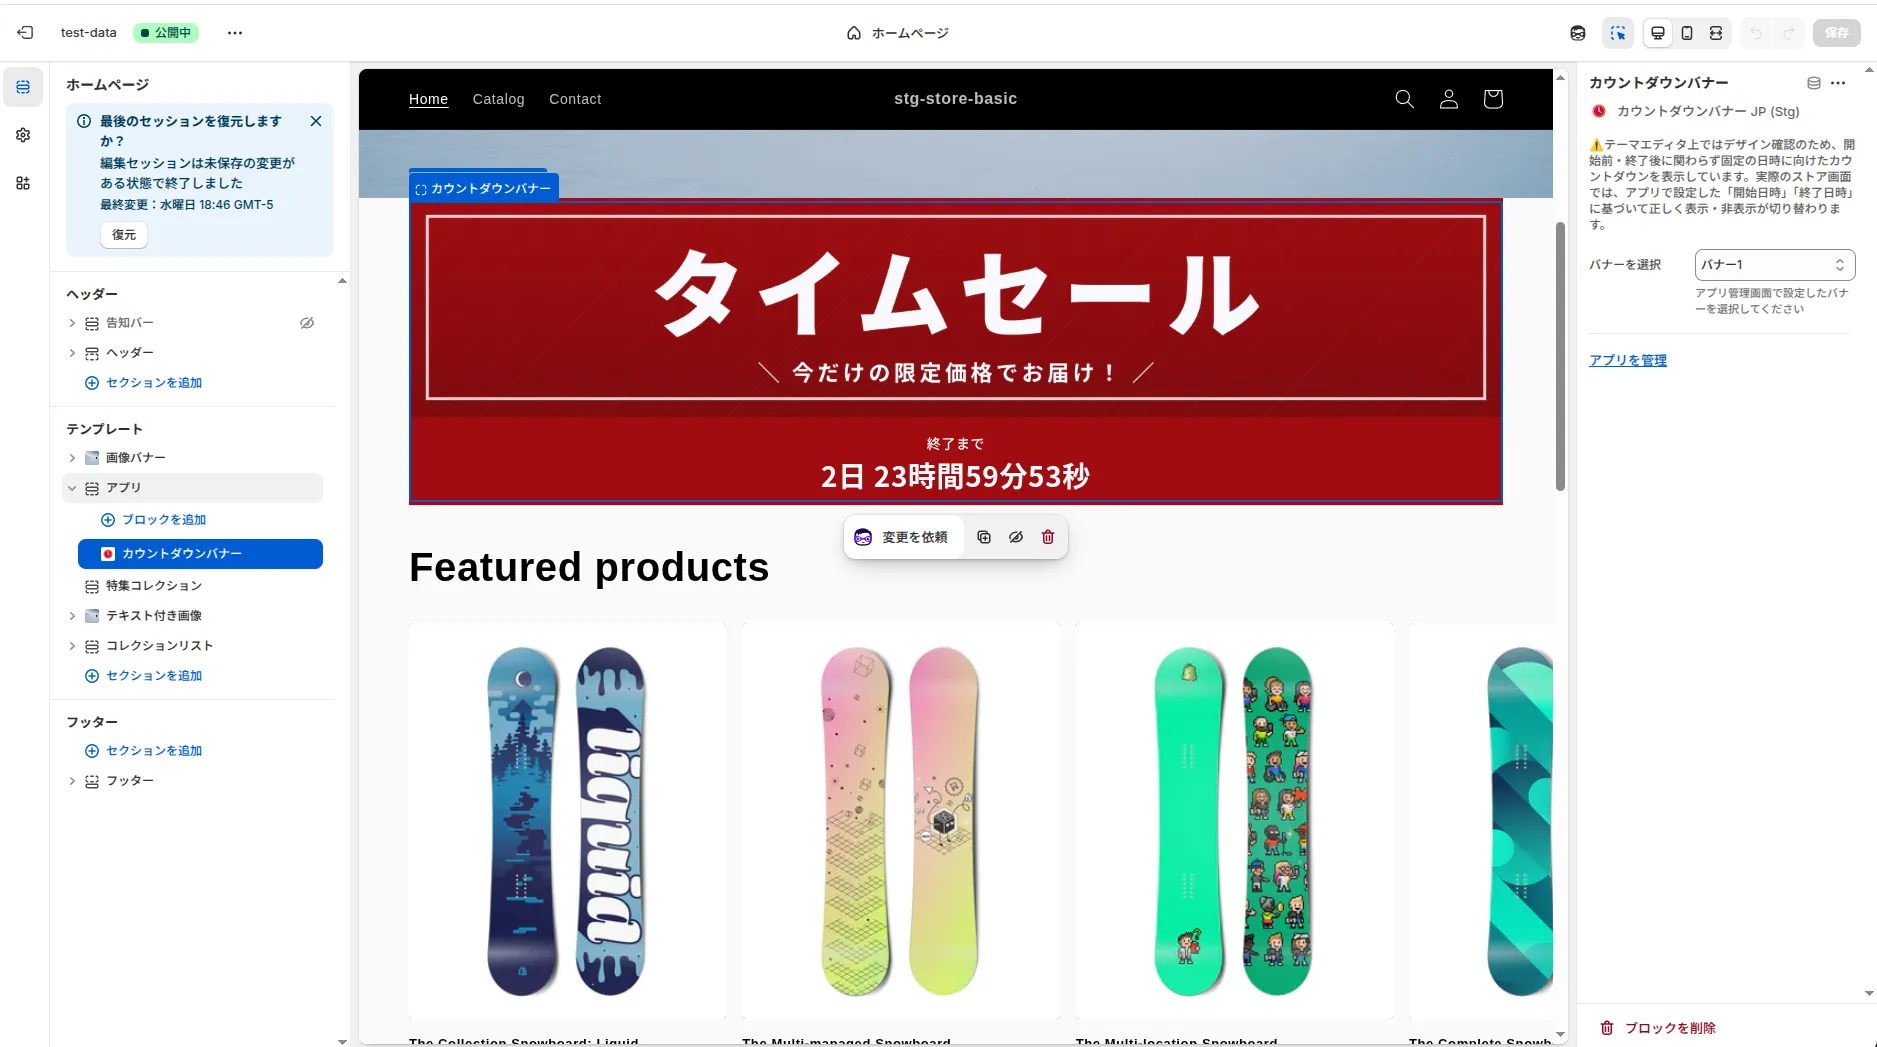
Check the settings of the added section (panel on the right).
- There is an item called "Banner slot".
- Select the banner number (e.g., 1) that you created in the app earlier.
When the banner appears on the preview screen, click "Save" at the top right to complete the publication!
5. Advanced Customization
It is also possible to create an original banner without using a template.
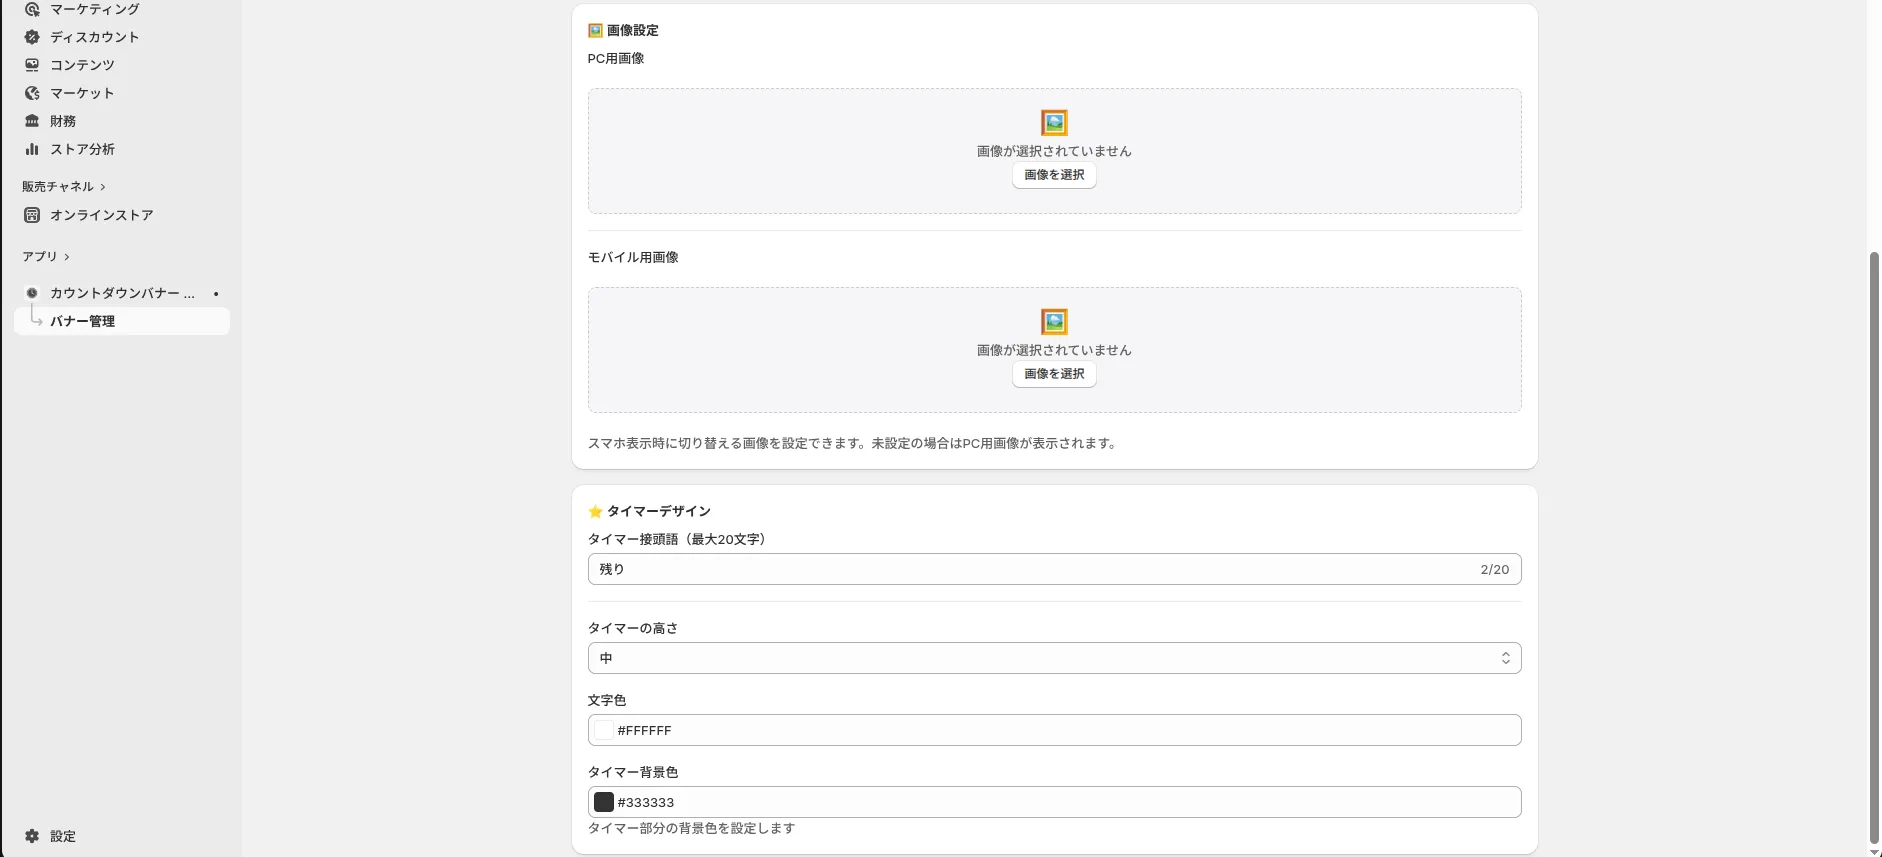
🖼️ Image Settings
You can set different images for PC and Mobile (smartphone).
- Desktop Image: Set a landscape image.
- Mobile Image: Set an image closer to a square that is easy to see on smartphones.
- You can choose from "Recommended Assets" or select a file from Shopify files under "Your Image".
⭐️ Timer Design
- Resize: Adjust height with "Small to Extra Large".
- Color Scheme: You can freely change the timer text color and background color to match your store's brand color.
Need Help?
If settings do not work well or if you have any questions, please feel free to contact us from the "Support" link within the app.